infrared photography
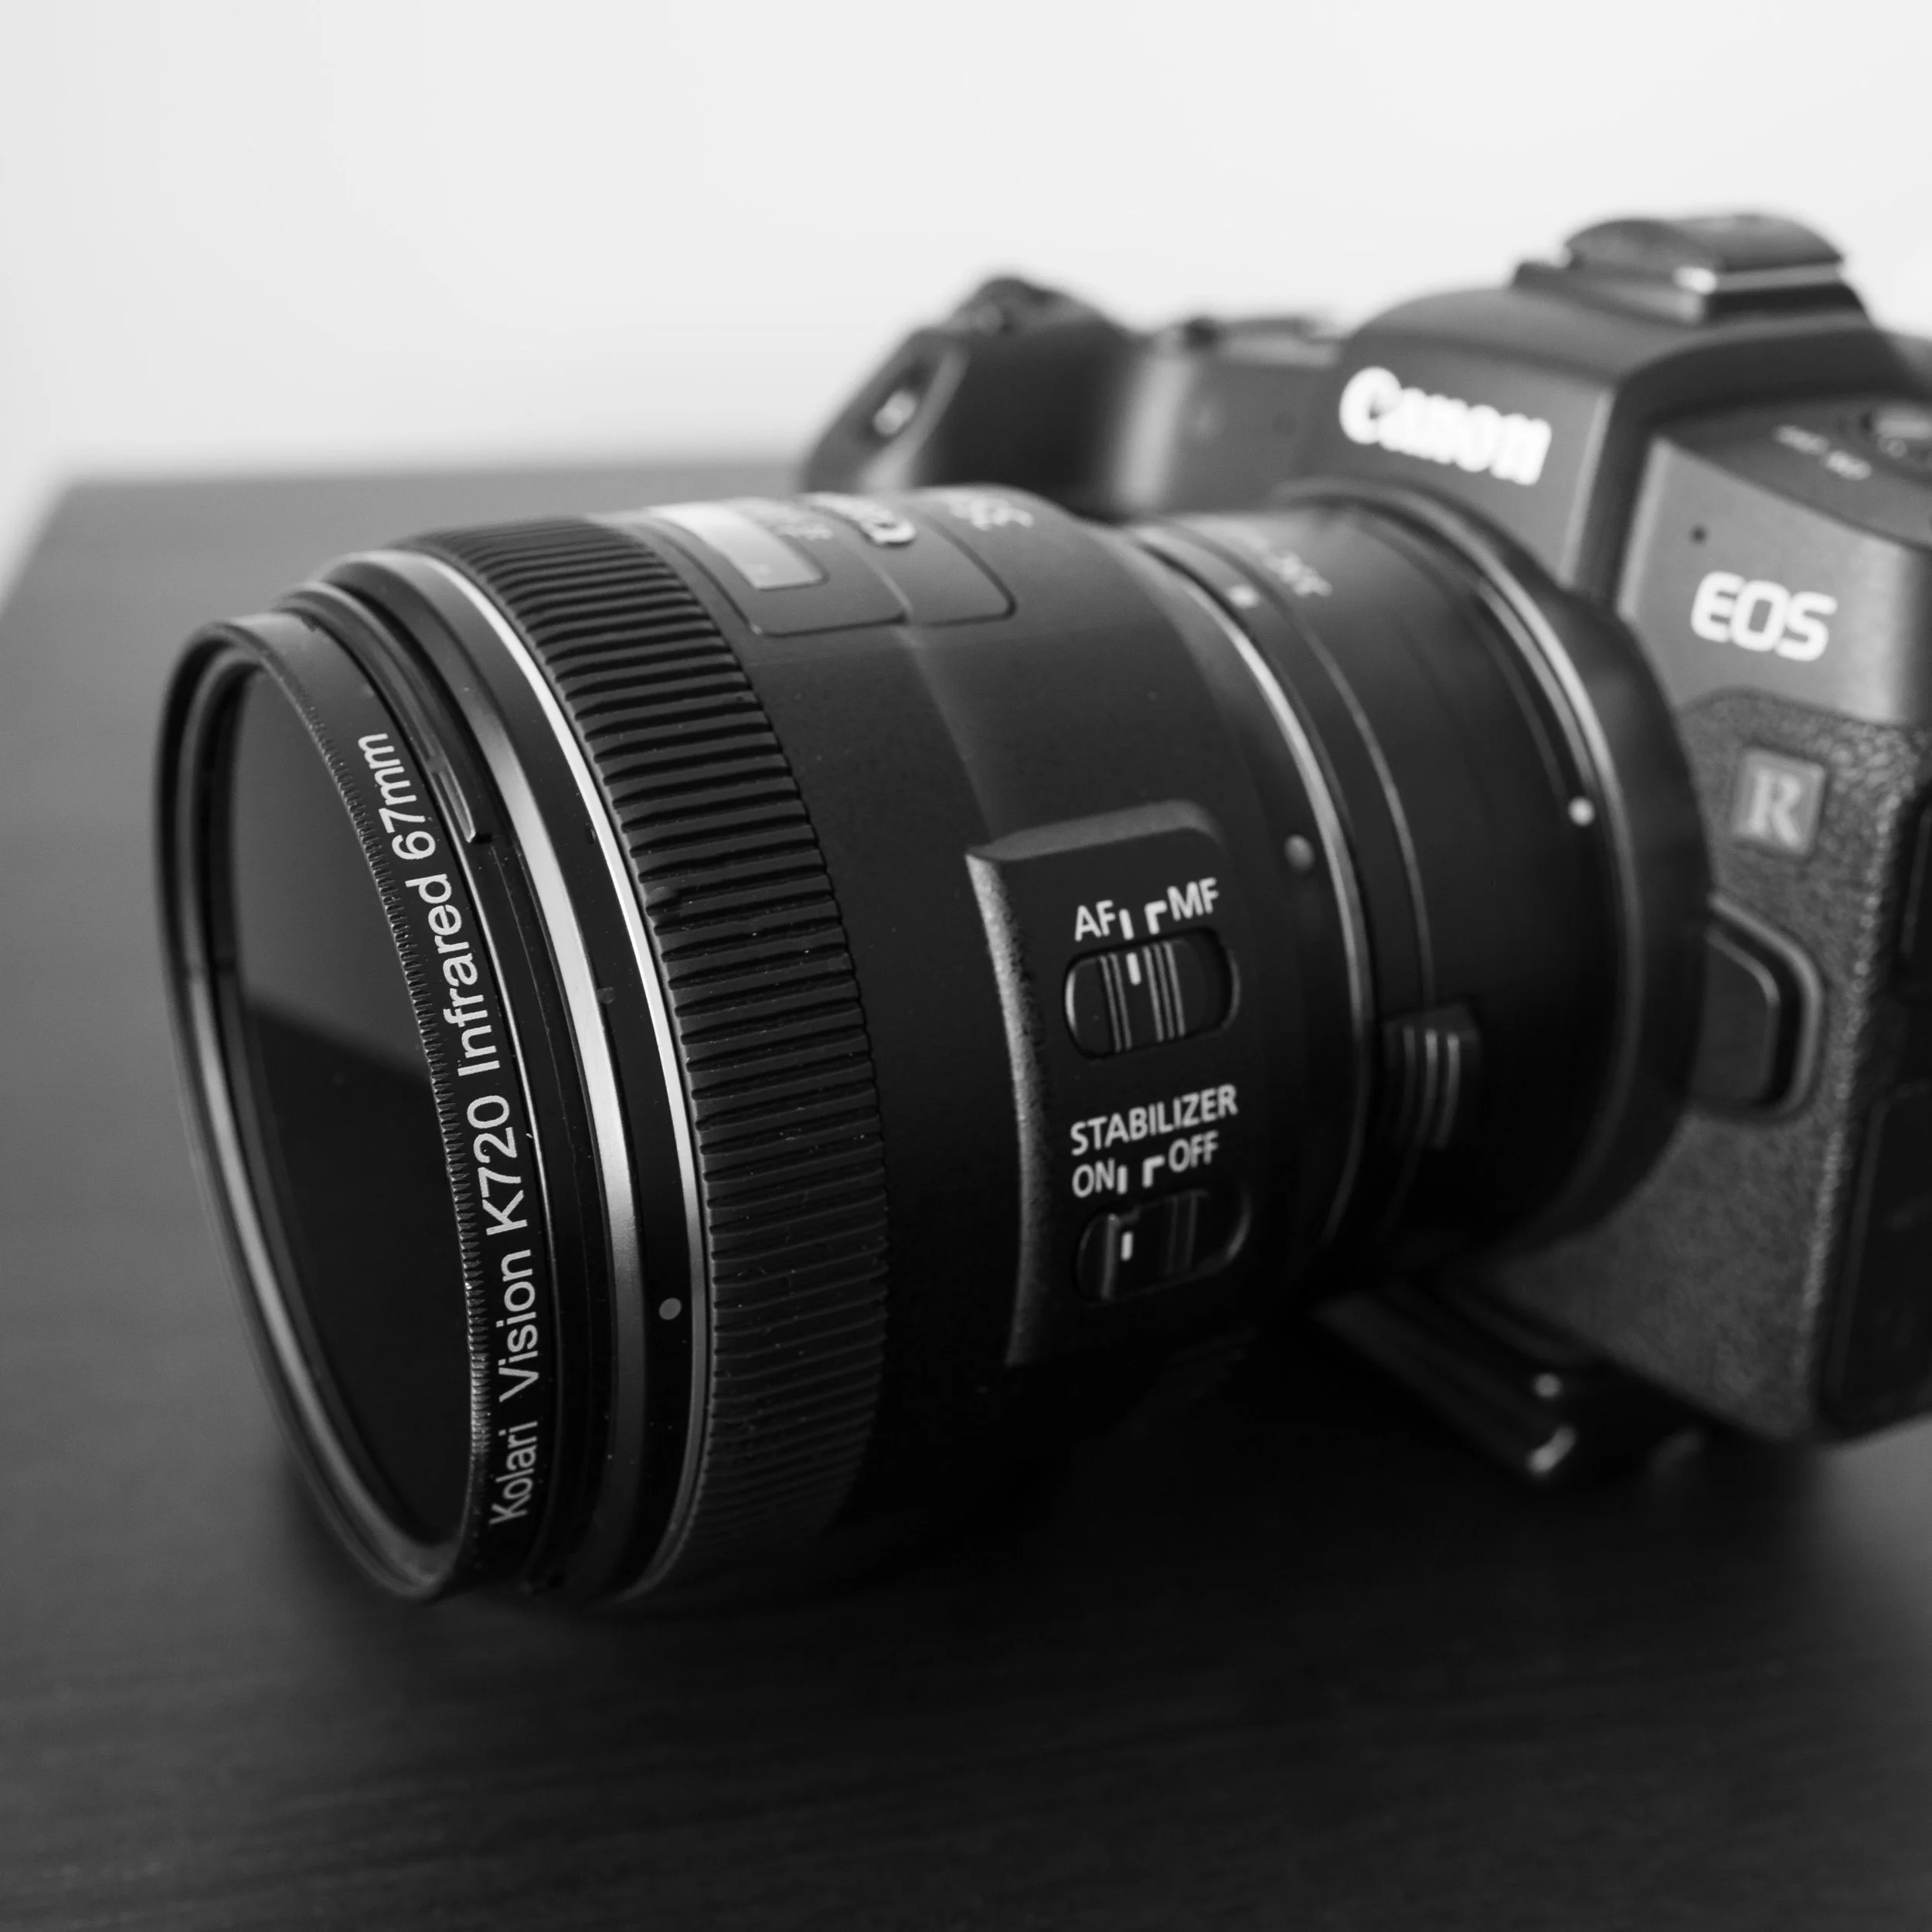
My daytime photography camera has been modified to make it sensitive to both visible light and infrared/ultraviolet light. Stock DSLR cameras have an IR/UV cut filter placed over the sensor to prevent infrared and ultraviolet light from affecting your photographs. Without this filter, any photographs you take will have a reddish glow, mainly from infrared light. In addition, however, anything organic such as grasses and leaves glows white in bright sunlight, while the sky - which does not reflect infrared light - appears as black. These characteristics can be used creatively in infrared landscape photography, particular when the photographs are converted to black and white. I use an infrared filter which is particular well-suited to black and white infrared photography - the Kolari K720.
I don’t always aim for the high contrast black and white infrared “look” that you may have seen online. It really depends on what the situation demands: if it’s a bright sunny day and the sun is directly overhead, I will increase the contrast to emphasize the strength of the light; if the sun is low in the sky, I will spread the tonal range out so that ll the light levels are represented. I do use Adobe Photoshop, but there are no special tricks involved: it’s all about finding an accurate range of tones for the different intensities of light in the scene. Quite often I’ll push the image data to the left side of the histogram and stretch out the mid-tones and highlights, but again it depends on what the situation demands. I try not to spend more than about twenty minutes post-processing a photograph; spending any longer than that is a strong indication that I’ve lost sight of the original intent of the photograph.
I tend to use older EF lenses because they use fewer lens coatings and as a consequence suffer less from infrared “hotspots”.
EF 50mm F1.8
EF 35mm F2.0
EF 24-105mm F4.0
deep space astrophotography
Deep space astrophotography is much more complex than daytime photography. I began back in 2016 by taking some blurry handheld images of the moon, and then moved on to star trails, wide-field Milky Way nightscapes, and then finally galaxies and faint nebulae. It’s a costly and at times very frustrating hobby, but ultimately very rewarding.
I have two separate astrophotography “rigs”: a portable setup for wide-field Milky Way imaging, and a semi-permanent heavier setup for imaging deep-sky targets from home.
Portable setup:
Tracking mount: iOptron Skyguider Pro.
Image acquisition: Canon EOS RP (my daytime camera but without the IR filter).
Lenses: Rokinon 135mm F2.0 or the William Optics W71 refractor telescope (330 mm focal length).
Accessories: Optolong light pollution filters, remote cable release.
Semi-permanent setup:
Tracking mount: Skywatcher HEQ5 Pro.
Image acquisition: ZWO ASI 1600mm dedicated monochrome astrophotography camera.
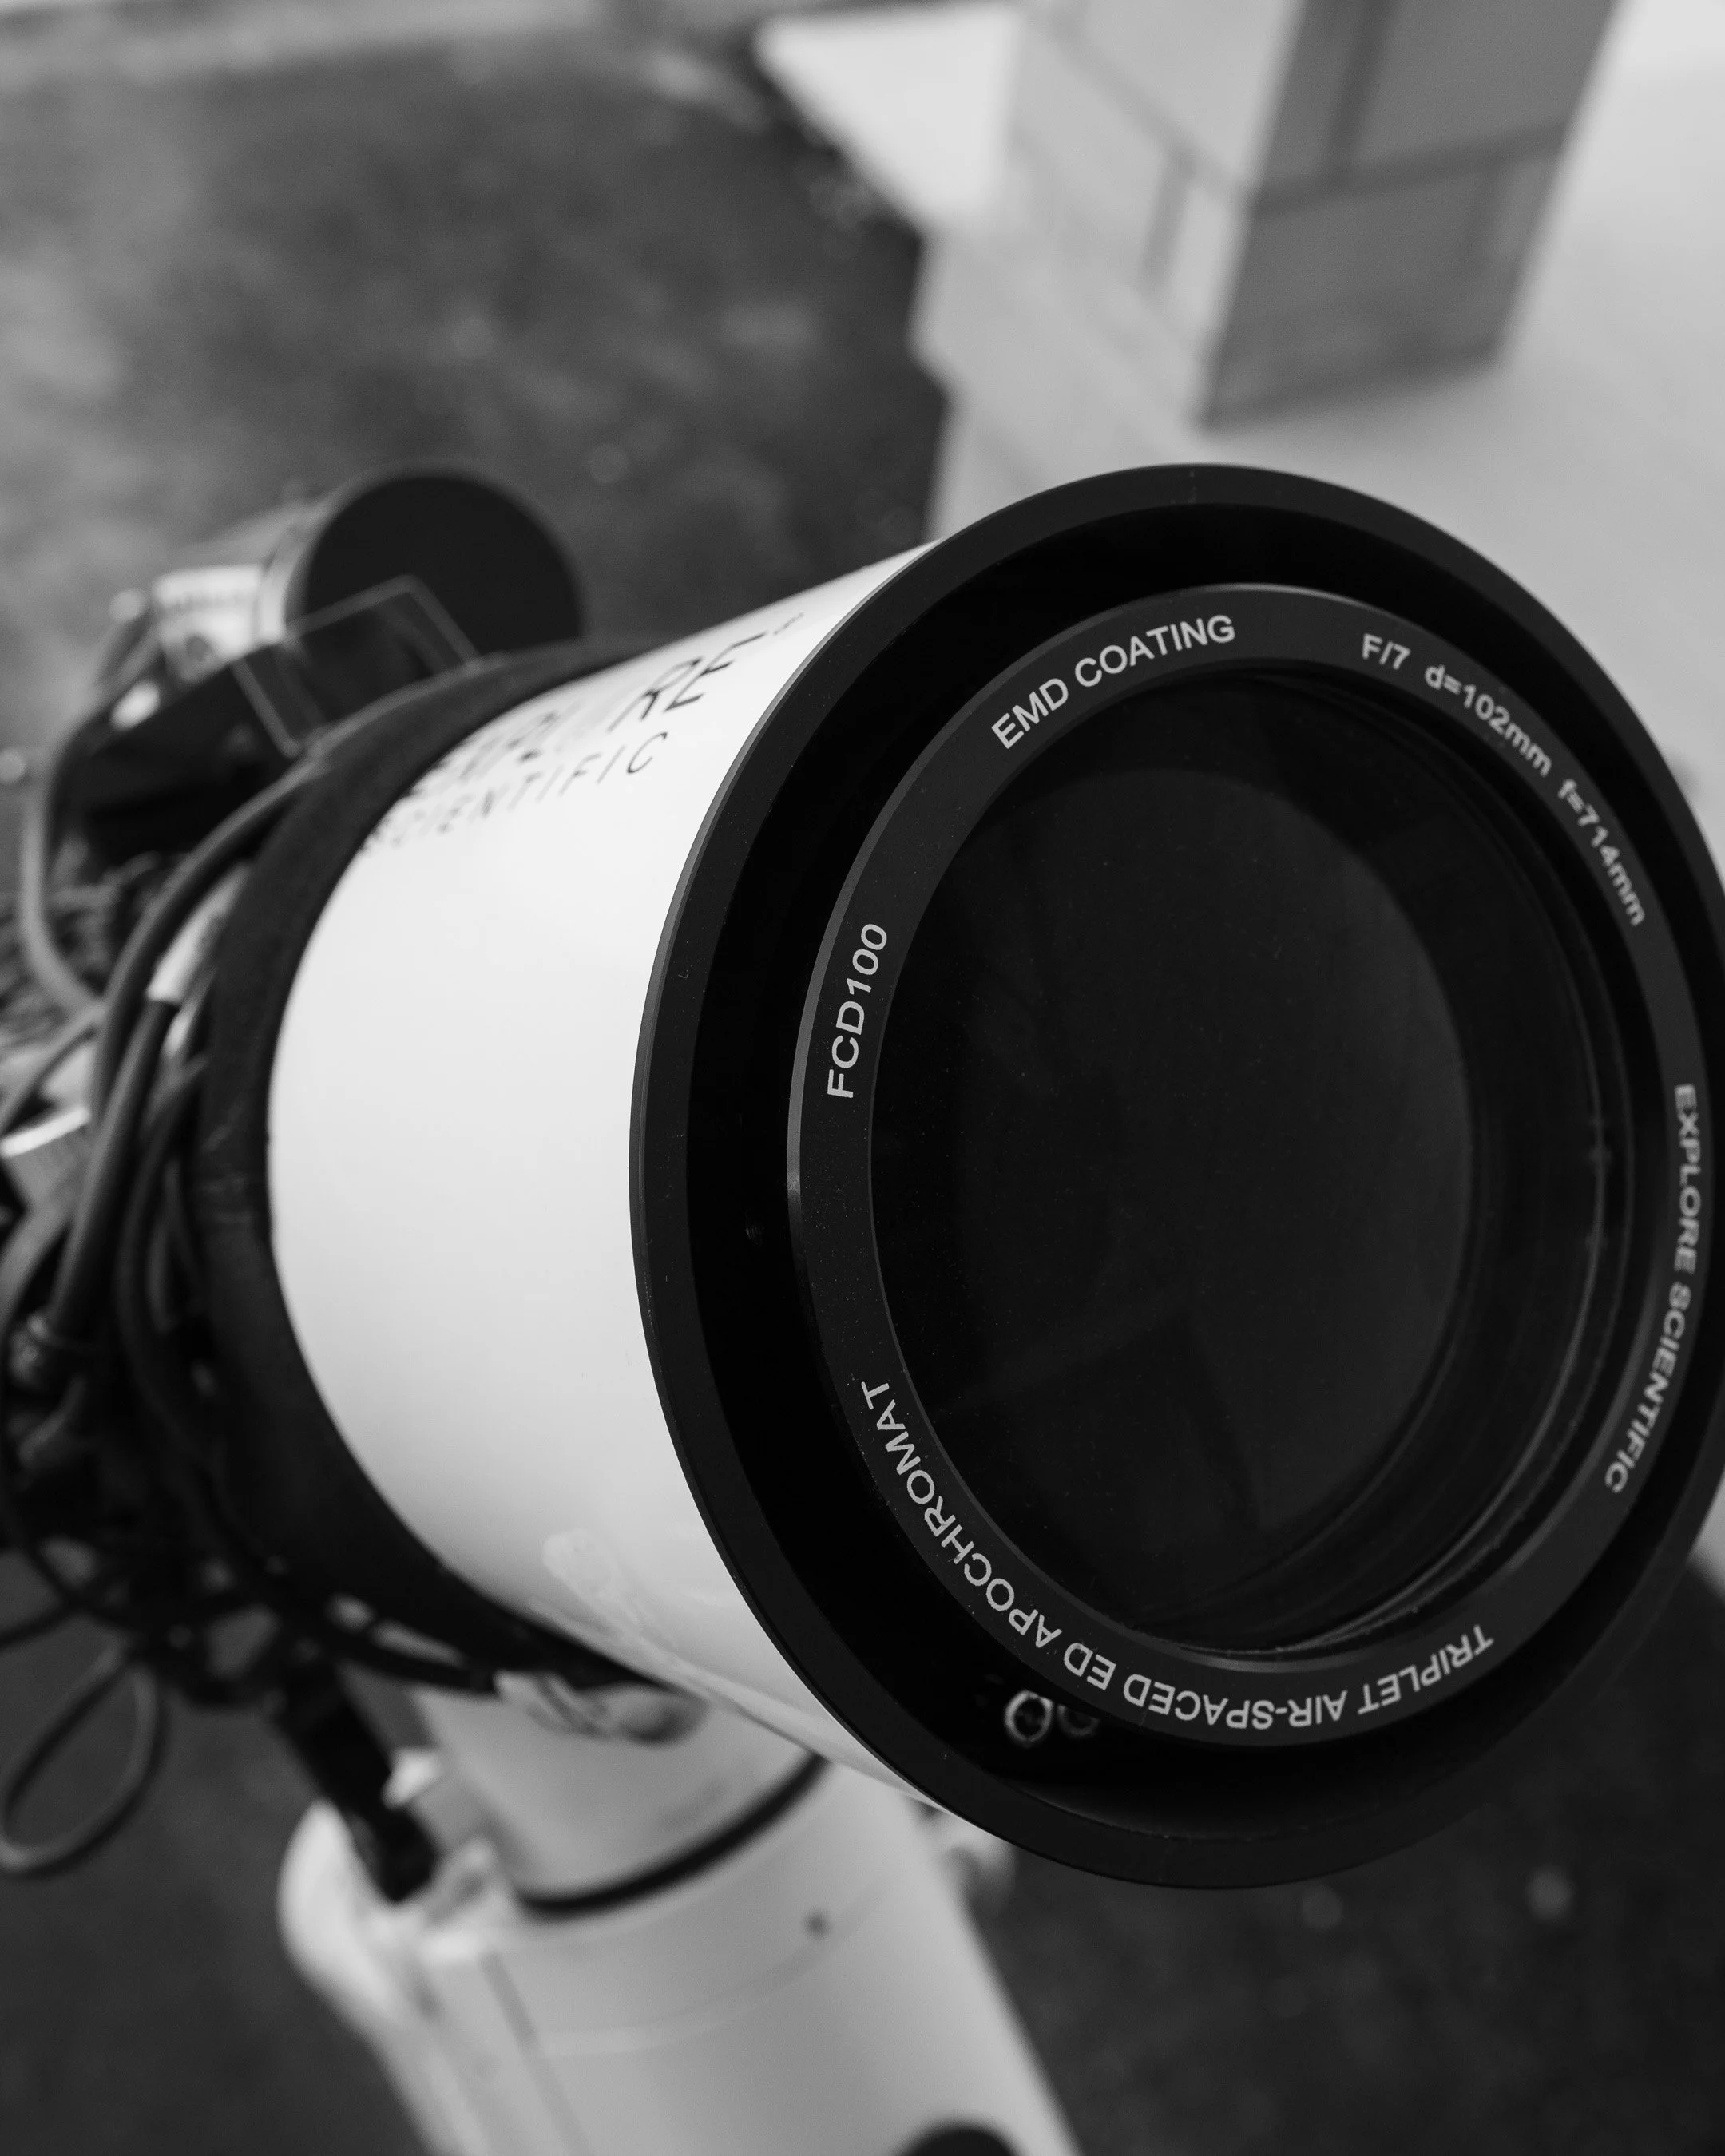
Telescope: Explore Scientific FCD 102 F7.1 (730mm focal length).
Guiding: Altair Astro GP130 guide camera (and guide scope).
Filters: ZWO 7nm LRGB (luminance, red, green, blue) and SHO (sulphur/hydrogen/oxygen) filters.
Accessories: ZWO automated filter wheel, Pegasus Astro electronic focuser, USB hub, power hub, dew straps.
Software: Nina (for image acquisition), EQMOD (for mount control), PHD (for guiding), DeepSkyStacker and Adobe Photoshop (for image processing).